TileEd Setup
Create beautiful tile-based worlds in 2D or 3D directly in the Unity Editor
TileEd Settings
The TileEd Settings window allows you to change some configuration options and set up the tiles and props to be used. It can be opened from the menu: Window > TileEd > Settings
TileEd will create all its asset files under /Assets/projectData. You should not move or rename this folder or any of the sub folders or files in it.
General
Here you can change the general settings of TileEd. Hover the mouse over a field’s label to get a tooltip of what that setting means. The first set of settings determines how the Unity grid is controlled since TileEd has its own grid. Next you will find settings to control what the TileEd grid and tools looks like.
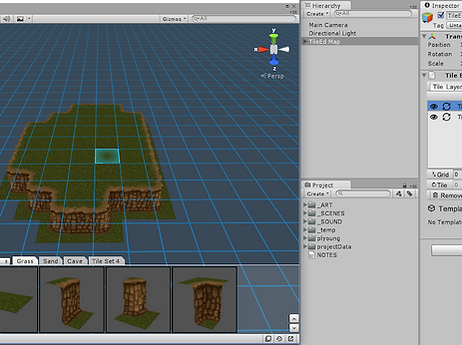
Tiles
This is where you will add the tiles to be used while painting a map. There are various kinds of tiles and the type you use will be determined by what it is you are going to draw.
Tiles are grouped into tile sets. Each tile set can be of a different kind, like Simple Tiles or Auto Tiles. Click on the [+] button to add a new tile set. You can then give tile new tile set a unique name and select what kind it is. See the sections below for more information on the different kinds of tiles supported by TileEd.
Some times you might see a load icon rather than the prefab’s thumbnail. In a case like this you will have to reimport the prefab/ model that was placed in that tile position. Simply select the prefab(s) in the project panel, right-click on them and choose to reimport.
Simple Tiles
The most basic kind of tile is the Simple Tiles. When painting a map you can rotate and place these individually.
To add new tiles to a Simple Tiles set simply drag and drop prefabs from the project panel into the area marked as “drop tiles here”.
You might also want to review the settings (NavArea, Static, Layer and Tag) in the drop area before dropping the new tiles. The tiles dropped will adopt these settings. Using the settings are optional and TileEd will simply keep the setting from the prefab if a setting override was not enabled. Which of the settings you enable and what you choose for each will depend on what it is the tile should represent. If for example it was a floor then you might want to enable “NavArea” so that you can set it as a “Walkable” - this will be important information for when you bake the NavMesh. Similarly you might want to place the tile in a special Physics Layer or apply a certain Tag to it if your game code requires it. You can change the settings later by using the arrow button on the tile but it is faster to apply the correct settings from the get go.
You can also click on the [+] button in the drop area to add tiles via an object selection window. This is useful when the TileEd settings panel is docked such that you can’t drag-and-drop the tiles onto the drop area to add tiles.
While painting, TileEd can automatically select a random model/ prefab to place for a tile. To use this feature you need to tell TileEd which prefabs belongs to a tile. You will note that there is a [+] button on the tile, click this and a new space will appear onto which you can drop the prefab which should be available for random selection.
Auto Tiles
Auto tiles are tiles which will automatically draw walls and transitions between tiles. When creating a new tile set, select “Auto” from the type drop-down. You also need to specify whether the tile set is using Rotating or Directional tiles. Rotating tiles require viewer pieces since a piece can simply be rotated to face in the correct direction. Take for example a wall tile which can be rotated 90* to face the floor tile from the north, south, east or west when placing a dungeon floor. The Directional option is supported where rotating a tile would not look good because the tile texture might not tile well or meshed do not align in such a situation.
You will see that the setup for auto tiles is different than that of simple tiles and very specific kind of tiles are required. You can still add simple tiles to an auto tile set too by simply dropping them onto the block marked “drop extra tiles here”.
First you need to determine what kind of Auto-Tile System will be used. This will determine how the walls of the tile set is drawn. Auto tiles has very specific requirements around the pivot’s position and direction. You can read more about auto tiles on this page.
Terrain tile set walls/ corners have their pivot at the top of the tile and the wall will face away from the floor tile so that it represents a cliff. Dungeon tile set walls will have the pivot at the bottom of the tile and when placed the wall needs to face towards the floor. So the dungeon wall is placed with its bottom aligned to the floor and facing towards the floor tile.
Note that adding walls and corners are optional. If you want you may simply add the floor tile of the set. This is useful when you will not be drawing walls but still want to set up transitions between various sets. You may also choose to add only the walls and corner and no floors which is useful to draw walls around areas that has a different floor pieces placed already. Of course you would paint these walls on a different tile layer as to not replace existing floor tiles.
You will notice that there are two sections to auto tiles. The first is the Definition of the tile. Click on the Transition button to switch to setting up transitions between this set and another auto tile set.
Select a tile set with which you want to create a transition and click on “Create Transition”. You will now be able to add the tiles which represents a transition from the source to the destination floor tile.
Props
Props are non-tile objects but objects you might want to place with the assistance of the tile grid. The painting tools for Props have additional options that are not available to tiles so that you have better control over the rotation and exact offset of the prop on the tile grid. Props may also share a tile space. Rather use Props when you have objects that are not really floor or wall tiles.
Props are very similar in setup to Simple Tiles. You simply drag and drop the prefabs into the block marked “drop props here”. You can also add the random variation prefab(s) to each prop.
When a prop is placed the pivot point will be used to determine the position. If for example you created a barrel or crate and want it to sit flush with the floor then the pivot should be at the bottom of the object and not its centre, else it will poke half way into the floor. You can still fix badly aligned props with the prop tool’s move and rotate gizmos but it is better to work with properly created art so that you save on having to fix problem areas which could have been avoided.


